Sunday, 4 November 2012

Finally, a series of up-dates to show what has happened over the past year.


My apologies to all those who have waited from last year to see what progress has been made on the renovation project. The lack of posts doesn't mean that it has stopped, rather the reverse and we are now close to actually completing it. Over this past year I have been so busy, often putting in 12 hour days at the building work, that I simply haven't had either the time, or the energy, to sit at the computer and compose postings for the blog.

So now the pressure is off, and I can spend a little time showing you what has been achieved. I shall deal with each of the areas separately and try to give you a flavour of work done to create the finished product.

For this first of the linked postings you will see the huge improvement made by putting a coating of crépi onto the outside of the house. Crépi is a chalk/lime based product that keeps the rain out but allows the walls to 'breathe' and therefore helps to prevent problems with rising damp. The first picture above was taken right at the start of the project and indicates quite clearly the damaged nature of the walls, the second one shows how smart the house now looks.

The actual process was not at all easy or pleasant. I hired a compressor, like those used for the pneumatic drills which dig up the roads, together with a special attachment which would blast the crépi onto the walls. The crépi came in sacks and simply needed water to be added and mixed in a concrete mixer. So we had one person doing the mixing, one person taking the mixture to a wheelbarrow up on scaffolding and a third person actually blasting the mixture onto the walls. I was the person doing the moving and a fairly ghastly task it was climbing up and down ladders with buckets of wet crépi and getting hit by bits of crépi bouncing off the walls.

In all we took three days to complete the task and not only the front but also the side wall and the part of the back wall not made from pebbles were coated. So now the outside is protected against the weather and the house looks a great deal more presentable.

The New Kitchen


In the post for September 2011 there is a description of the start of the work on the new kitchen and the first picture above shows the state of the room just after the start of the work. With considerable difficulty we did manage to put the new oak beam into place and remove all the props holding up the floor above.  In the up-to-date pictures you can see both the new oak beam as well as the one we retained.  The concrete delivery went reasonably well – it was pumped into the room and we had a good team of us spreading it over the floor area, but polishing it to a smooth finish was a bit of a trial given that it was such a large area.

After that the walls were formed using wood stud-work and for the outside walls I put into the voids high density polyurethane sheets to provide substantial insulation. Once the plasterboards were in place I covered the joints with jointing material and then had to sand it all back to a finish suitable for painting – it is a horrid task, particularly on ceilings as inevitably you get completely covered in white dust.

Then I had to put down the floor tiles. These had been bought right at the start of the project to make sure that we had an exact colour match across the whole of the house. What I also tried to ensure was that joints between the tiles would match up with the tiles already laid in the first half of the house. So we drilled a pilot hole through the wall where the corridor across from the hallway to the new kitchen would go exactly in line with an existing tile joint. I then took this down the corridor and judged where I needed to start in the kitchen to make it all work. As it happened when I finally tiled back from the kitchen down the corridor to the hallway the joints were less than 5 millimetres out; effectively unnoticeable.

The next step was to put in all the units and then the work surfaces. And to be sure that we had got the measurements exactly right this meant putting the cooker in place forcing us to abandon the original temporary kitchen and move immediately into the new one. The result of all this work can be seen in the two up-to-date pictures above.

The Utility Room


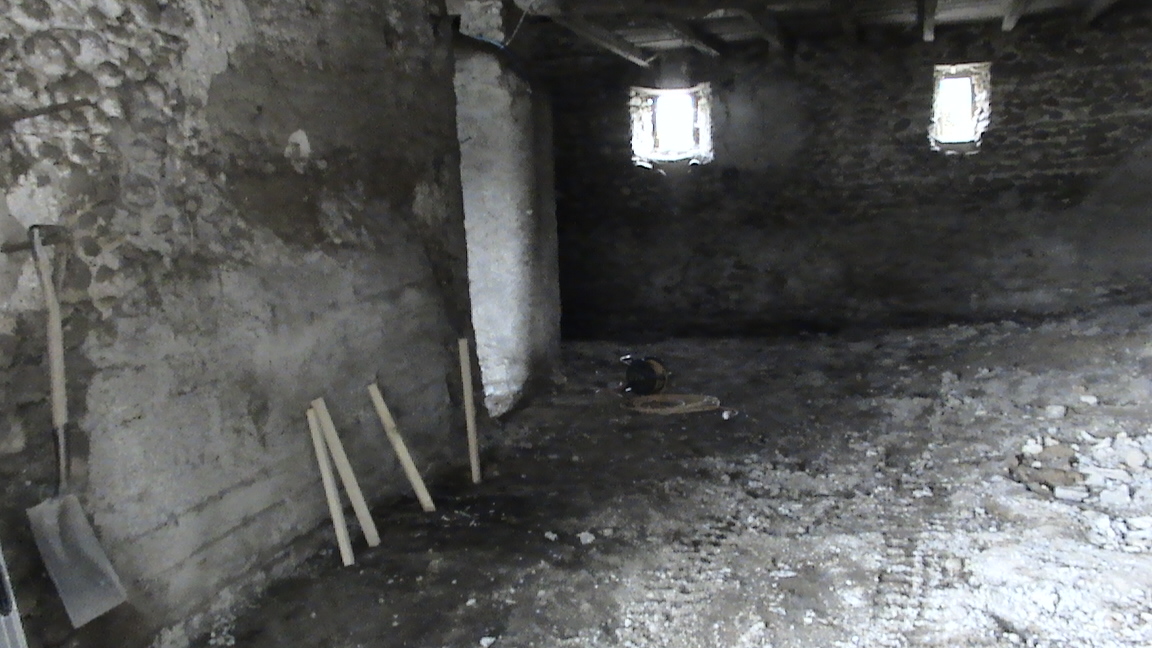
Space was available off the new kitchen to create a small but very useful utility room. The first picture above shows the space prior to any work commencing, it was set up to be used as an animal pen. And the second picture shows part of it in its finished state – it's difficult to take a picture which shows the space well.

We've taken some of the units from the old kitchen and re-used them for this room but put in a new work surface. There's sufficient space to have the freezer, fridge, dishwasher (what a boon!) and the washing machine all in the room and therefore not making noise and taking up space in the kitchen proper.

The Dining Room


One of the last rooms to be completed as we can easily use the space in the kitchen for sitting down to eat with a reasonable number of people. The first picture shows it just after we had started taking out the original concrete floor which had formed an animal pen. The doorway to the right of the picture leads into what has become the kitchen. Across that back wall we have created a corridor to form the wall for the dining room and it connects to the hallway in the first half of the house. That corridor is still awaiting a coat of plaster as can be seen through the doors in the up-to-date picture. Originally there were two large beams supporting the floor above but they were in a very poor state and had also bent downwards. We decided that the simplest thing to do was to replace them with new oak beams and you can see these in the up-to-date pictures. As with the kitchen beam it was quite an effort to get them up into place. Note the floor tiles are exactly the same as in the rest of the house.

Where the shelves are in the up-to-date picture was originally a doorway into the other half of the house. We retained the recess to give a bit of interest to the room which would otherwise have been a rather plain rectangular box.

The table was quite a find at a local 'Troc' – it means swap, and is a warehouse where people put items for sale and the owners take a commission. The table is solid oak, impossible to take apart and enormously heavy. We had to engage the assistance of a friend who has a large trailer to get it back to the house and then getting it into the room was a mite difficult to say the least, it only just got through the double doors.

Last month we were visited by members of the book group which I still communicate with in UK and we were able to sit eleven of us round the table for very convivial meals.

The Master Bedroom and En Suite Bathroom


This was one of the places where we have had to change significantly from the original plan. The idea had been to put two bedrooms separated by two small en suite bathrooms into the space. The first picture shows how it was at the start with the supporting timbers for the original roof structure in place. Our French builder who renovated the roof to the house did not move these timbers as we had expected and that the posed the problem of how to alter the floor levels as the beams holding the timbers up would have needed to be moved downwards to create sufficient headroom for the two bedrooms/bathrooms.

However, the further problem was that if the beams had been moved downwards we would have needed to dig out the floor in the kitchen to gain headroom there. This would have been enormously difficult, as mentioned in a previous post, as there are virtually no foundations to the walls and we would have needed to underpin them – very difficult and costly. So we made the decision that we would have only one bedroom with an en suite bathroom.

Even that proved very difficult, firstly in 'rescuing' the support structure for the roof. A slow and at times rather dangerous piece of work involving a large number of acrow props till the bedroom was sorted. Then the dormer had to be created to make space for the bathroom. Because the roof pitch is so low it was a real problem to get the dormer roof in place and it was quite a feat of building engineering to achieve it.

The window to the bedroom is in fact the front door that we had put in place at the start of the project; if you look at the picture of the newly crépied front to the house you'll see that we have replaced it with a second-hand traditional French farmhouse door. We have a wrought iron balcony balustrade ready to put on the outside of this window/doorway but that will have to wait till warmer weather now as it will involve the window being open for quite some time as cement dries.

In the picture of the new kitchen you can see that we've put in a wood-burning stove. The chimney for this stove runs up into this bedroom and is hidden behind the doors of the wardrobe. When the fire is lit we open the doors to let the residual heat from the insulated chimney warm the bedroom.

Because we bought rather more floor tiles than we actually needed for the ground floor – there has been far less wastage than we calculated – we have been able to tile out both of the new en suites in the same tiles as the ground floor. It gives a nice sense of symmetry to this part of the house.

The door to the left of the entrance to the bathroom leads into a small space under the eaves, it is immediately above the utility room. It is boarded and plaster boarded out and is to be a dressing room. When I have the time I shall put a small dormer window in to provide natural light and ventilation. On the other side of the bathroom you'll note the space where the hot water tank sits. This awaits a door which is to be made for us by a friend who is a carpenter/cabinet maker, but who is also very busy with other projects. So it may be some time before we get this closed off properly.

Bedroom 2 and En Suite Bathroom


This room is located immediately above the dining room and was an area where the farmers who had used the house had evidently stored hay and/or straw – you can see some of this in the first picture above. Clearing away all this was both dirty and dangerous as the floor was none to sound and I couldn't see where there were fragile bits through which I might fall.


A wall had to be built between this room and the master bedroom and that helped to support some of the roof structure. A stud and plasterboard wall was also put in place to create a corridor running from the original landing past this room to the master bedroom.

There is a door to the right of the entrance to the bathroom which isn't visible in the pictures and this leads into a cupboard space. In here there is also a trap door for access to the roof void.

The Study


With the creation of the new kitchen and utility room the space which had been used previously as a temporary kitchen/diner was freed up. All the kitchen units and equipment were removed and the space is now designated as a study. The computer is located there as well as all the free-standing bookshelves we have, meaning that we can bring together the majority of the books we possess.

My intention is to put all my guitars and amplifiers in the room as well and make use of it as a practice room; my wife has other ideas though! When we have a large number of visitors we can use the room with its futon as extra bedroom accommodation. In due course when time permits and I have the energy I intend to re-point the pebble back wall.

Joining the two halves together


The last major building task having formed all the rooms both upstairs and downstairs was to knock through the wall separating the two halves of the house. This was something of a concern as just to one side of where the opening would be formed is a very large beam supporting the roof above the hallway. The possibility existed that if we took out the wall the beam could slip into the gap and the roof collapse. Thus some very careful building engineering went into the work to ensure that it wouldn't happen during the actual work and that it would remain stable once the holes had been created.

In the early picture you can see both upstairs and downstairs that there are no holes in the walls. And you can also see that these areas had been plastered over. This was fortunate as we were able to take the wall down carefully leaving the plaster intact which meant that the inevitable dust that was produced by the demolition work did not get into the half of the house which we were living in. Of course it liberally coated every surface in the 'new' half and that took a mighty effort to get rid of.

We have plastered back round the exposed areas on the walls where the holes have been created. In the corridors proper as shown by the picture of the one leading to the kitchen we await the arrival of the plasterer who did the work in the hallway so that the finish will be the same thus making the junction between the two halves less obvious.

Half Way there with the Concrete


 (This is a post that was written in September 2011 but never put onto the Blog. I publish it now to give a little continuity to what has been posted above)

Well it happened!

As stated in the previous post about the areas which are to be the patio, terrace and the summer kitchen the work of preparation to create them was completed and only the concrete needed to be dealt with. We had calculated fairly carefully the quantity required and took for the first delivery what we had thought was the maximum amount a lorry could carry in one go – 6 cubic metres. Only a fairly short time is allowed for deliveries so we had to work as fast as possible to spread the material over the prepared area. And the amount delivered was inadequate it only covered four fifths of the terrace.

It was also a red hot day resulting in the concrete drying off very rapidly. So levelling it and then, at the critical moment, polishing it proved very difficult. The latter indeed proved almost impossible for the last parts that we did requiring the concrete to be sprayed.

Thinking ahead we had a discussion with the driver of the lorry about how to deliver the concrete for the kitchen floor as it will be impossible to get a lorry very close to the doorway into it. The answer will be to use a pump system, but of course this will involve an extra cost in the delivery. And the driver also said that actually the maximum load was 7.5 cubic metres.

So for the next stage we ordered up that amount and went through the same process of laying it in the patio and summer kitchen areas as well as finishing off the terrace. This time the weather was a little cooler and also the majority of the work could be done whilst it was shaded from direct sunlight. A much pleasanter experience therefore. The results of all this can be seen in the photos above which you could compare with the ones in the last but one posting.

Now the task is to crack on with the kitchen in terms of fixing sufficient support for the roof so that we can take out all the support from the floor and then do the concreting – which will be the other half alluded to in the title of this post. To that end the new oak beam, which can be seen on the patio, which we bought a week ago will have to be manoeuvred into position at first floor level. Given that the beam weighs approx 1 tonne this is going to be a daunting and therefore slow task!

Sunday, 4 September 2011

Starting the Kitchen


Aside from removing the floors in the house and using the resultant hardcore we have also started on forming the kitchen area in terms of its structure. From the earliest picture above you might be able to see that the front wall in the barn area did not go above ground floor level and it was frankly in a shocking condition. The simplest solution was to take it down completely and replace it with a new and much more stable block wall.

Simpler said than done though. The roof structure left by our previous French builder was tied in to the wall in a most 'awkward' fashion making the removal problematic. So a good deal of head scratching was done until a solution was found involving stabilising part of the wall with concrete and the use of a number of acrow-props.

The result in terms of building up the wall can be seen in the latest picture above. The hole in it is the size of the door that will be inserted – a triple conventionally-opening door giving as much light as possible into the room as it is over 9 metres long from front to back.

Overall therefore a good start on completing this side of the house. It won't be finished to a point where we shall be able to use it for Christmas but we can reasonably confident, fingers crossed, to be in full use by Easter. Watch this space.

Part Way to a Patio, Terrace and Summer Kitchen


As indicated in the previous postings we have generated vast quantities of hardcore from removing the old barn roof in October and the floors in the second part of the house. Piled up at the front of the courtyard it has been something of an eyesore and a concern as to what we might do with it given that none of our neughbours seemed interested in using it for their building projects – removal by skip here in France is dreadfully expensive and the alternative of many, many trips to the local tip did not bear thinking about.

The answer has been to create a patio under the barn next to where we shall step out of the new kitchen – this is four blocks high from the ground which will enable us to see over the garage roof to the Pyrenees. From this patio a terrace has been formed across the whole front of the house leading onto the remaining area which had been pigsties and which we shall turn into what is called here a 'summer kitchen'. So foundations for the walls were pulled using the mini-digger and the blocks laid leaving us the task of back-filling the area with the hardcore. It has been a back-breaking effort made worse by the knowledge that had we made the decision to create these areas before we cleared the floors we could have put the hardcore straight into them – a painful lesson to learn.

From the pictures you can see the prepared areas where the next task will be to have pre-mixed concrete delivered and laid. After which the major problem will be to keep the dogs and cat off, footprints are not wanted!

The Second Half Starts


Three linked posts here to deal with the work now in train.


Firstly the progress on the garages has been 'rewarded' by the work on the second half of the house commencing in July. Though the first thing that was achieved was the renovation of the back half of the roof over the garage area; it is now all weather-proof which is a reassurance given how much 'stuff' we have crammed in to the garages!


The next step was to clear out the existing floors in what will become at ground floor level the kitchen and the dining room. We started with this as we need to sort out the levels both for the ground floor and then with that as a reference we can fix the first floor level. We have made things much easier for ourselves by deciding that over the kitchen we shall have only one very large bedroom with en suite bathroom meaning that we don't need to have quite so much headroom as was originally planned. Thus the floor does not need to be lowered which would have meant lowering the ground floor in turn and that would have been difficult given that there are no foundations to speak of under the walls, we would have had to do underpinning with all the extra effort that would have entailed.


The ground floor had been used as pigsties/cattle pens and the floor was formed in concrete and we started by simply breaking it up manually with a sledge-hammer and pickaxe. But we reached a point where the concrete was so tough that it proved impossible to break it. So off to the local tool hire place we went where the only thing they could provide was a compressor and pneumatic drill. I then spent the next day using this beast to break up as much of the floor as possible within the time we had it for. I have never before used a drill of this sort and it was, to say the least, a testing experience – I had no idea that the drills weighed so much, the drilling down was relatively easy but the hauling it back up …......... At the end of the day my arms, shoulders and back were complaining bitterly!


The result of all this effort was a huge amount of hardcore which we heaped up against the front wall of the courtyard as well as putting it in place for the patio we shall create outside of the kitchen under part of the barn. After the concrete had been removed we still needed to dig down into the subsoil to get the necessary depth. Fortunately a friend has a mini-digger which we were able to use and with it large amounts of earth were dug out and removed to be piled up round the edges of our field. The result of all this effort in terms of the floors can be seenin the first picture above. But of course this earth also had within it many, many stones which we took out and added to the hardcore heap. This reached such an enormous size, see the second picture above, that we asked of one our local farmer neighbours whether he would be interested in using any of it for the building work that he is presently doing. He took one look at all the broken up concrete and declined the offer, though he did say that he would try to discover if there was anyone else who might be interested; thus far, very fortunately as will be revealed in due course, no one has come forward.

Thursday, 26 May 2011

Garages


As indicated in the last post the task for winter/spring was to create garages in part of what were the old pigsties; see the original picture above of how they were early on in our time here. There was an urgency to this as the space will be needed to store all the 'stuff' that is in the unrenovated part of the house prior to the work commencing on that. So I approached a number of potential builders who I thought would have been interested in having the work. It's a familiar tale now, as I noted about the barn roof in the post below, no quotes were forthcoming.

So in the end it was down to working with a friend to do the necessary work. Much slower going than I would have preferred as he had other social and family commitments to honour. On the other hand it was a very pleasant experience as we got along well and had fun whilst cracking on with the work on the days he was available. We were also fortunate that the weather was good on the days when the roof was renovated.

Talking of which our friend is none too keen on working on roofs, so as soon as we had completed the part over the front of the actual garages he stopped helping me. Which was what he had said all along. I was fortunate that my older son paid a visit just at that time and he helped me renovate the part of the roof which faces onto the road. And I have now completed the part of the roof facing into the courtyard from the garages to the house – this can be seen in the photo above.

The remaining work to be done therefore is the whole of the roof at the back, all seventeen and a half metres long of it. What causes a particular difficult here is that there's very little space between the back wall and the wall to the neighbouring garden which will make taking the tiles down and storing them a real problem. It is possible for me to do it but I think that I might wait till the friend who is going to help with the barn roof is on site and do it with his assistance.

Notwithstanding this remaining issue it is possible to use the garages and we are pleased with the way that they fit in 'seamlessly' with the rest of the property. With this space we can store all the things we need and get on with the renovation work in the second half of the house. Will this happen in summer/autumn? I sincerely hope so!

Friday, 21 January 2011

The Barn Roof - a Start


It has been a considerable time since we had any substantial building works done to the house largely as a result of needing to raise funds by selling our house in GB. That happened over last summer releasing the necessary funds but then we faced the same problem as we had at the start of the whole project - finding a reliable builder who was prepared to do the work at a reasonable price and in a reasonable timescale.

The most urgent aspect for us was, and is, the roof of the barn; the first picture above shows the state the roof was in early on in our ownership. Over the four years we have now had the property it has steadily worsened under the impact of the weather and various insects which have consumed the wood. By the autumn I had begun to have serious doubts about the ability of the structure to withstand another winter similar to that we experienced last year. If we had snowfalls of a comparable quantity then the weight might prove too much and the whole structure would then collapse. This would cause many more problems for us than trying to rescue as much as possible of what exists and might be re-usable.


We approached a series of builders, either people we have got to know or people recommended to us. And we were told that times are tough for builders in this region at the moment as there has been a considerable cutting back in the amount of work for them as people have stopped commissioning work under the impact of the financial difficulties both here and in G.B. Holland, Germany, etc. Hence we thought that we should have no trouble finding someone to take the work on. Wrong! Despite several people visiting, discussing the work, taking measurements and promising to provide us with quotes we had virtually no takers. In the end we have secured the assistance of an English friend with whom we shall undertake to do the work ourselves - not what I had hoped as I am a little tired of working flat out on this project, but needs must.


So at the start of winter we took the old roof off - the tiles and the battens that is - exposing the bare bones of the structural members. You can see this in the second picture above. Two surprisingly things emerged from this work. Firstly that the majority of the timber is in quite reasonable condition. Certainly there are plenty of places where timber will have to be replaced with new or reclaimed timber, but there is far less of this than we had expected. The other aspect is that the barn was not put up in one piece; from the way it has been constructed the original part dates back beyond the eighteenth century, the newer part nearer to the road is probably a nineteenth century addition.


In taking off the roof, the tiles what we could reclaim were carried down to ground level and stored under the barn area, you can see this in the pictures. What was unusable for reconstructing the roof we have kept in a heap to be used as hard core for the terrace we shall put in across the front of the house.

But we are not able to carry on for the moment and finish off the re-roofing as our friend has to be elsewhere for some time now. So as a temporary measure to protect the structure from, the weather we put weather-proof sheeting over it. I tried hard to acquire ‘proper’ tarpaulin but it seems that it is not something that is sold in France. What you can see in the third picture above is not as durable and we are hopful that it will be able withstand the force of the weather for a sufficient time till we can finish the job in late spring.

Between now and then we shall also work on the pigsty area to create a double garage and workshop. Initially this will act as a storage area only so that we can clear out all the ‘stuff’ that we have stored in the un-renovated part of the house. And once the barn roof is completed we shall turn to finishing off this part of the house. This will be a substantial piece of work but we are hopeful - do we never learn??!! - that by the end of this year the structural work will be completed and we shall be facing ‘only’ the finishing tasks. Watch this space!

Tuesday, 2 November 2010

La Vie Française, no. 3

Life certainly gets more sociable and interesting in the middle months of the year; it is the time when many towns and villages have their ‘fêtes locales’. This usually involves some sort of event during the day, a meal in the evening and then some sort of music - the most frequent is one of the many local mobile discos.

Recently our village put on a ‘soirée grillade’ - just a meal with no other arrangements to spoil the evening. It was billed to start at 8:00 in the evening but we have learned from all the previous events that we have attended that nothing starts on time, or anywhere close to it. So we didn’t bother to go along to the Salle de Fête until 8:45 thinking that perhaps things would get moving around 9:00. A complete mistake, we stood around chatting and consuming aperitifs until finally at 10:00 moves were made to the tables and the meal began.

In truth not an awe-inspiring meal but it was accompanied by copious quantities of wine, which of course assisted in the business of communication and making new acquaintances amongst our French neigbours! Added to the aperitifs it meant that one of us was a bit, how shall we put it, tiddly/squiffy/ over-happy. And proceeded to go round inviting many of the village neighbours to come to our house to carry on the party as well as also being able to see the work we have done to improve/renovate the house. And of course there is a great deal of interest in seeing what we have done.

So from approximately 11:30 on a steady trickle of people made their way to our house and the fun got under way. Much alcohol was consumed, much hilarity as it took effect and much singing of traditional French, English and Scottish songs, most of it led by the Maire. It took an age to finally get everyone away and I fell into bed at close to 4:30 in the morning with no real recollection of about an hour of the night after 2:00, but I don’t think that I behaved badly as none of the neighbours has said anything untoward!!

Any way we’ve satisfied a great many people’s curiosity about the house at the same time as providing much enjoyment and furthering good relations. Roll on the next village event and a chance to do something similar all over again.

Monday, 2 August 2010

La Vie Française, no. 2


It’s been a while and many things have happened but I’ll pick out this one for your interest. We have an enclosed stove in our main sitting room - look at the second picture in the post for December 2009. It is wood-burning only and at the start we were able to use the copious quantities of old wood taken out of the house as the reconstruction work proceeded. I acquired a chain-saw and cut it up into usable pieces, not an easy process as the majority of this wood is very old, and therefore very hard, oak. But it burns hot and slow and so is ideal for the stove. But of course there is a limited supply of it and it became apparent in autumn that we might run out in the course of winter. So I bought a supply of mixed oak and beech from a local supplier in the village and that has been sufficient; indeed we do have some wood left over for next winter.

At the beginning of this year a note came round from the Mairie - parish council in equivalent British terms - inviting residents to express an interest in taking wood from the local “fôret communale”. I went to the Mairie and said that I would like to have ten cubic metres of wood. I was then telephoned and invited to a meeting one Saturday morning to discuss and decide the allocation. In due course an ‘interesting’ meeting took place in which all the bids for wood were read out to the assembled interested people and then a discussion ensued. Most of us had asked for amounts between 10 and 15 cubic metres, but two people (I think that they are related in some way) had asked for 25. This caused considerable irritation amounting almost to anger as the view was that they wanted that amount for commercial purposes rather than personal use. Remember this was all conducted in rapid and highly accented French straining my capacity to understand to the very limit. The end result after much wrangling was that everyone had their requests met except the two with ‘excessive’ demands who were told that they could have only 15.


And then off we went to local woods to be told where we could cut down the trees. As I am not as well equipped as all the locals who tend to have all the kit I was pointed in the direction of a particular part of the fôret where it would be easier for me to cut the trees and get the wood out to our house. I was also shown that the trees that could be cut down were marked in a particular way.

Knowing that the trees would need to be cut before the onset of Spring, apparently there is a wish not to disturb nesting wildlife, I immediately set to work to cut down trees. I do have some experience of tree-felling as I have had to remove some trees in various gardens over the years. But that is not quite the same as cutting trees down in a wood. The first attempt led to the tree falling against another tree and refusing to budge until I had cut several lengths from the bottom, in effect felling it many times over. Much hilarity for my on-looking companion.

However, I did get the hang of ensuring that trees fell as I wanted most of the time. Only once did a tree fall in completely the wrong direction and in so doing fell partly across a road. Fortunately no traffic was passing and I was able to cut away the offending braches and clear up before anything did pass by. As each tree was cut I also cut it into lengths which could be moved and put into our trailer and then taken to our field.

But this would have taken a very long time were it not for our neighbour kindly telling us that he would use his tractor and trailer to do the transporting.
With all the wood back in our field the next step was to cut it to suitable lengths and split it, if necessary, to make it usable in the fire. Simple to say but what a task! Much chain-sawing and axe work to accomplish this plus it all needed to be stacked neatly in order to leave it to weather and be suitable for burning.

The pictures above show aspects of the process which I have to say would not really be worthwhile were it not for the fact that the one resource we do have in abundance is time. And at the end of it we have now 12 cubic metres of cut wood which cost approximately a seventh of what we would have to pay to acquire commercially, so perhaps it was worth doing. As for next year ……

Friday, 22 January 2010

La Vie Française, no 1

We thought that you might be interested in what happens here aside from all the building work that we’ve been undertaking. So this is the first in an occasional series of posts which will cover elements of what we do outside of improving our living conditions.

For the past six months Joanne has been assisting twice a week, on a voluntary basis, at a local refuge for stray and unwanted dogs. Apart from the enjoyment of working with the animals it also helps her to improve her French as the other volunteers are locals and speak very little, if any, English.

To help raise funds for the organisation, events are held drawing in the public. For example, about three months ago a ‘cowboy evening’ was organised and we were persuaded to attend. Apparently, I discovered after the event, cowboys, country music and the like are very popular in the area. Large numbers of people turned up in full cowboy regalia and much enjoyment was had by them doing line-dancing and American country/barn dancing – bizarre in deepest France.

Recently we were invited to what we thought in advance was to be a social ‘tea party’; an afternoon gathering of the volunteers with some refreshments. Wrong! It was, I judge, a committee meeting of those most involved with the work at the refuge. But it was like no other meeting of this type that I have ever been to. Yes, there were refreshments – plenty of cakes of one sort or another (we have learned that in this area sweet food is preferred on these types of occasion to savouries) and an endless supply of champagne. All to the good so far in terms of what we had expected. But there didn’t appear to be any formal ‘rules’ to the meeting – no obvious chairperson, no agenda, no secretary, no minutes. As a result anarchy seemed to be the order of the day. The lady who is the central figure in the organisation, we have no idea if she has a formal position or title, was unbelievably aggressive. As other volunteers tried to raise points she interrupted and would not allow them to make any points. When she felt in any way criticised she shouted people down. At one point it seemed to me that there might be a walk-out by a husband and wife pair because the wife was shouted at, the husband made serious threatening noises about what he might do. The accounts that were presented were so incomplete as to be little more than a joke and no one raised any questions about them. And of course the meeting was conducted in very rapid, heated French which got worse as copious amounts of champagne was consumed. Shouting, champagne and cake proved a lethal combination as the cake got sprayed around from various mouths in the heat of the moment leading me into avoiding action! And it all tested our comprehension to the limits and beyond.

Eventually we managed to find a gap in the arguments and shouting to make our excuses and leave, somewhat shell-shocked by what we had witnessed. And we did wonder whether the people who had been on the receiving end of the aggression might cease to give of their time and efforts as a result. Joanne has asked the person with whom she goes to the refuge whether the meetings were usually conducted in the manner which we had observed and apparently it was not an unusual occurrence.

So, our first experience of how the French can conduct the business of a voluntary organisation was something of an eye-opener. Not at all what I had expected in a country where every voluntary organisation has to register with the state and have a proper set of rules by which it is supposed to be run.

Wednesday, 23 December 2009

A Series of Pictorial Up-Dates, no. 1


We have made such a lot of progress from the very ‘low base’ that was the house when we first acquired it that I think it might be worth giving you the contrasts between then and now. So what is below is a series of linked posts showing just this. It has to be said, though, that there is in all cases a deal of finishing work to be done – painting, putting in skirting-boards and architraves, etc, etc. But it is comfortable and most importantly given the onset of winter and colder weather wind- and water-tight.

In this post you can see the difference between what the salon/sitting room used to be like and the situation now. In the first pictures you should be able to see the damage wrought by the collapsed part of the roof and the large crack in the wall in one place. And then the position as we now enjoy it.

Just remember the hard work, time and money that’s gone into achieving this, we do!!

A Series of Pictorial Up-Dates, no. 2


In this set you can the difference in what is for the moment the kitchen/dining room.

As with all the areas in this part of the house the fact that the roof had collapsed in several places caused a great deal of damage. But this room seems to have been used as a store/wine cellar and was therefore not particularly well looked after even when the house was occupied.

The room is being used as a kitchen/diner only until we can get to work on the second half of the house and create the proper kitchen and separate dining room. Once that has happened this room will revert to being a cosy sitting room/study/music room.

A Series of Pictorial Up-Dates, no. 3


And in this set the change is from very badly damaged bedrooms and sitting rooms to the principal entrance-way into the house. The area is virtually unrecognisable from how it used to be and provides a splendid, welcoming entrance.